ROOT 5 FARM
  • About Us
    • Our Farming Practices
    • Meet your Farmers
    • Employment Opportunities
    • Newsletters
  • CSA Membership
    • 2026 CSA Information
    • Pick Up Locations
    • Local Partners
    • Root 5 Farm Recipes
    • CSA Handbook
    • CSA Member Log-In
  • CSA Sign Up
  • Find our Products
    • Vegetable/ Recipe Search
    • Restaurants & Stores
    • Power Kraut
    • Fermentation Celebration!
  • Contact Us

Midsummer Vegetable Rolls

7/6/2026

 
Picture
This "recipe" is yet another choose your own adventure, and it doesn't require turning on a single kitchen appliance. These vegetable summer rolls are super fresh, and can change with the seasons in regards to what veggies are included. 

When building summer rolls I always like to include a few categories of components: crunchy vegetables, fresh herbs/aromatics, and protein. These ones are loaded with cucumbers, tofu, mint, basil, and more... all complimented by a peanut dipping sauce. 

Don't be afraid to branch out and make this your own. Try adding cooked and cooled shrimp instead of tofu, or rice noodles instead of greens. 

Ingredients:

1 package of rice spring roll wrappers
1/2 bag of mixed greens or lettuce
4 cucumbers, sliced thinly
3 cups sliced crunchy vegetables - peppers, carrots, radish, salad turnips etc
1 block of firm tofu
2 cups of fresh herbs- basil, cilantro, mint, and/or green onion

Quick & Easy Peanut Sauce: 
3 parts peanutbutter (crunchy or smooth)
2 parts soy sauce or tamari
1 part sesame oil
1 part rice wine vinegar
maple syrup & sriRAWcha to taste
optional: minced ginger & garlic

Method of Preparation: 

1. Prepare all of the fillings before you begin- drain and slice tofu into matchsticks or small planks, slice or julienne the vegetables, and pick the herbs from their stems. If using green onions, slice into 3 inch pieces. 

2. To assemble: Fill a large, shallow bowl with warm water. Soak one rice paper wrapper in the water until it begins to soften. Lay the wrapper on a plate and fill with a handful of greens, some tofu, a few pieces of vegetables and a few pieces of fresh herbs.

3. Fold the sides inward and wrap snugly like you would with a burrito. Wrap tightly but also gently to avoid ripping the softened rice paper. Repeat with the remaining rice paper, soaking and wrapping just one at a time. These can be wrapped a few days in advance and kept in the refrigerator. 

4. Serve with your favorite peanut sauce, or make your own by combining the ingredients listed above together, thinning with warm water until you reach your desired consistency. 

Scallion & Chili Crisp Focaccia

4/22/2026

 
Picture

​Our neighborhood cafe, Sunnyside Coffee Co. features a different seasonal focaccia every Wednesday. Since scallions are in abundance, they’ve been making this Scallion Chili Crisp Focaccia and decided to share the recipe with us. The combination of ingredients ends up tasting similar to a scallion pancake- without all the rolling and pan-frying. 

This base focaccia dough recipe could not be simpler- mix it up a few days before you want to use it to give it time to rest in the refrigerator. The dough should rest for 24-72 hours in the fridge, then proofed in a pan for 2-4 hours before baking. 

If you’ve ever wanted to get into bread baking, but you're not feeling confident about your technique, this is a super easy recipe to jump into. Make it your own with added mix-ins or toppings- but definitely start with this combination to use up all your spring scallions. 

This recipe makes one 9x11 pan, cut into 8 big pieces for sandwiches, or 12 smaller squares.

Ingredients
512g all purpose or bread flour (this is 4 cups but I really recommend weighing it)
2 tsp instant yeast
2 tsp salt
​2 cups warm water
1-2 bunches of scallions, chopped
2-3 Tbsp chili crisp 
Flaky sea salt
Olive oil
​

Method of Preparation
  1. A few days before you want to bake your bread - Combine flour, yeast, and salt and chopped scallions in a large bowl. Stir-in 2 cups of lukewarm water until a ball of dough forms. 
  2. An easy way to get the right water temperature is to combine ½ cup of boiling water with 1 ½ cup of cold water. 
  3. Cover the bowl and set in the refrigerator for 24-72 hours. The dough should double in size, so you can add a coating of olive oil to the top to help it from sticking to the lid/covering. 
  4. On the day you’re ready to bake, coat a 9x11 pan olive oil- be generous- and tip the dough out into the pan. Let this rest in a warm place for 2-4 hours. The dough should relax and fill the pan up almost completely…be patient. Once you’ve reached this point you can preheat your oven to 425F
  5. Coat your fingers with olive oil and press into the dough to create dimples. Don’t go too wild, as your dough can deflate entirely. If your dough isn’t fully covering the pan you can gently stretch it to reach the corners. 
  6. Top with flaky sea salt and drizzle with chili crisp. Use as much as you like, but usually a few tablespoons is plenty.
  7. Cook for 25 minutes, rotating the pan once about halfway through.  Cool for 10 minutes before removing the bread from the pan and slicing.
Picture
Picture

Green Goddess Dip

4/7/2026

 
The quickest, easiest, most delicious dip recipe is here. I’ve been making this recipe for years and have it memorized because it is so simple. It’s great with crudite, crackers, or you can use it as a spread on sandwiches. 

If you are dairy free, you can easily substitute the ricotta cheese for a block of firm tofu, just make sure you blend it up really well. I don’t think you’ll have any leftovers, but in the off chance you do- this makes a great quick pasta sauce too! ​
Picture
Picture
Ingredients
2 cups of ricotta cheese
½ cup of mixed fresh herbs, chopped (dill, basil, rosemary, parsley, oregano… you pick!) 
3 garlic cloves, minced
1 lemon zested and juiced
1 Tbsp olive oil
Salt & pepper

Method of Preparation
  1. Add the ricotta, garlic, lemon zest, and herbs to a blender or food processor.
  2. Blend everything together until smooth, drizzling in the olive oil at the end to smooth everything out. Add salt & pepper (or any other seasoning) to taste.
  3. Serve cold with veggie sticks, chips, or crackers.
Picture

Herby Broccoli Falafel

4/7/2026

 
Picture
Picture
​Herby Broccoli Falafel

When broccoli and fresh herbs are abundant, I always jump at the chance to make this recipe. These falafel are packed with tons of flavor and nutrients, and are perfect to make for a meal prep or a crowd of friends. Add to the top of a salad for extra protein, wrap in a fresh pita bread with lots of topping, or make them into burger patties for a vegetarian option at your next cookout. 

I always like to serve these falafel with a creamy sauce. Make your favorite tzatziki or in a pinch, mix together tahini, miso paste, lemon juice and garlic to drizzle right on top. 

You can customize the herbs to your taste, but I always recommend lots of fresh dill!
Ingredients
1 small head of broccoli- chopped into florets
1 small onion, peeled and chopped
3 cloves of garlic, minced
1 packed cup of fresh herbs (dill, parsley, mint, basil etc)
¾  cup of dried chickpeas cooked until soft, or 1 15 oz can of chickpeas, drained
3 tbsp almond flour or bread crumbs
1 egg
Zest from one lemon 
1 tsp cumin powder
1 tsp coriander powder
​1 tsp paprika
1 tsp salt
1 tsp baking powder

Method of Preparation
  1. Preheat your oven to 425F and line a baking tray with parchment. 
  2. In a food processor, pulse the broccoli until it is very small and has a “rice-like” texture. Remove broccoli from the blender and set aside. Add your onion, garlic, and herbs and pulse until chopped finely. 
  3. To the food processor add the remaining ingredients + riced broccoli and pulse until combined. No need to make this smooth, you want some texture to remain. 
  4. Form balls with a small scoop or your wet hands- 1.5 inch is the goal, but you can make these larger or even into burger patties if you prefer. 
  5. Bake for 30 minutes, flipping halfway through, until the falafel are golden brown. 
  6. Serve with your favorite creamy sauce or our Root 5 Farm Beet Hummus. 

Vegetable Spiral Tart

4/1/2026

 
Picture
Maybe you’ve seen pictures of this gorgeous spiral tart all over the internet, but I first made it 3 years ago when I saw it on pinterest. I wanted to make it vegan but you can absolutely use your favorite non-vegan dough and fillings. What’s fun about this tart is that it can be filled with whatever vegetables you like (as long as they can be shaved or sliced into long strips) 
The dough that I like to use is an olive oil and herb dough, but you can use your favorite pie crust recipe or storebought too. ​
​HERB AND OLIVE OIL DOUGH
1 1/2 cups all purpose flour
​1 teaspoon salt
1 teaspoon dried herbs (I love rosemary or lemon thyme but use whatever you like most) 
1/3 cup olive oil
1/3 cup water or plain unsweetened plant milk

Mix flour, salt & herbs together in a bowl. Make a little well and pour in your liquid ingredients. Mix together with a fork until just combined, then turn out onto a floured work surface for a quick knead until it comes together into a ball. Dust with flour and use a rolling pin to flatten out into a circle. Transfer onto your tart pan and push sides into the grooves. Use a knife to trim the excess. Prick all over with a fork and blind bake at 350°F for about 10-15 minutes (until it’s golden brown). 

FILLING
Under the beautiful vegetable spiral you’ll need some sort of filling. Here you can really get creative. I usually like to spread a layer of garlic hummus or a flavored vegan cream cheese. Kite Hill has chive, everything, and garden veggie and all of these work great. Plus one container fills up the tart perfectly. If you want this to be more of a ratatouille style, you can lay down some thick tomato sauce. I’ve even made this with a layer of pesto. If you’re not vegan I think a layer of ricotta cheese or a bechamel sauce would work well.  Get creative! 

THE SPIRAL
Okay, this is what you’re all here for. The vegetable spiral on top looks STUNNING but is actually pretty easy to make as long as you have your vegetables all prepped. You can use whatever vegetables you like, but I really love to incorporate as many colors as possible. The more straight the shape of vegetable, the easier it is to get thin slices, so if you’re at the market you might want to maybe skip over the really fun shaped zucchinis and squashes. You’ll need about 4-6 cups of vegetables for an entire tart. Here’s what I like to use in mine:

Ingredients:
1 eggplant
1 zucchini
1 yellow squash
3 large carrots
1/4 cup olive oil 

1.Cut your vegetables into long thin strips, all the same thickness. A mandolin makes this the easiest (please watch your fingers) but a vegetable peeler or good knife skills can work too. . If your veggies are very wide, you may have to cut each strip in half lengthwise. I usually have to do this for the eggplant so that it’s not taller than all the other veggies. Get all of your veggies cut and ready and a bowl of olive oil. 

​2. Once you have your tart filling spread along the bottom of the crust, you’re ready to spiral. Dip each vegetable strip into the oil, or use a brush if you prefer.. Start with your first strip (anything but carrot) and create a tight spiral on your cutting board. This is going to be your centerpiece so make sure it’s as tight as possible. You can wrap one more strip around to secure the spiral, and then move this to the center of your filled tart. 

3. Continue wrapping immediately so things stay nice and tight. Alternate between all the vegetables as you go. As you get closer to the crust you can really start to pack them in so that I have as many layers as possible. Once the tart is full, pour any remaining oil on top and sprinkle with salt and pepper. 

​4. Bake at 350°F for about 50 minutes. The vegetables should still have a bit of texture to them. Cool for a bit before you slice and serve!

Power Kraut Deviled Eggs

3/31/2026

 
Picture
Picture
This recipe is perfect for early spring, when eggs and Power Kraut are abundant but fresh veggies are still in short supply. Deviled Eggs can be as basic or exciting as you like, but this twist on the classic adds a great briney taste without being too complicated. Any of our Root 5 Farm Power Krauts would be perfect in this recipe, with our favorites being beet sauerkraut or kimchi. Make these to bring to a party, or just for your own enjoyment. 
​

Ingredients
6 large eggs, hard boiled, peeled and cut in half lengthwise 
2 tbsp mayonnaise
¼ cup of Root 5 Farm Power Kraut, sliced finely + brine from the jar
Salt & pepper
Garnish options: chopped cilantro, microgreens, sprouts, or chili crisp

Method of Preparation
  1. Gently scoop yolks from the halved eggs and add to a bowl with the mayonnaise and sliced sauerkraut. 
  2. Mash together until smooth, adding brine to adjust the consistency that you like.
  3. Season with salt and pepper or any additional spices you like. 
  4. Pipe or scoop filling back into the egg halves, and add optional garnishes.

French Onion Soup

3/31/2026

 
Picture
I’m French so this always tastes good when I make this soup. You really only need 3 or 4 ingredients to put this together & it’s perfect for a cold day. Top it with toasted croutons and maybe a little melty vegan cheese and it is perfection. The longer you caramelize the onions, the deeper the flavor. I like to take my time and get them super caramelized so it sometimes can take awhile… it’s worth it. If you have nothing in the pantry or fridge for dinner, this is a great solution. ​
Ingredients
2 large yellow onions, sliced 
3 cloves of garlic, minced
1 Tbsp oil
​1 tsp brown sugar
4 cups of stock of your choice
1 sprig of dried thyme or other herb of your choice
salt & pepper to taste

Optional: 1 Tbsp all purpose flour

Method of Preparation
1. Add oil to a soup pot with tall sides and turn the burner to medium. 

2. When the oil is hot add the sliced onions and stir to soften- about 10 minutes


3. Add sugar & a sprinkle of salt/pepper and mix well.


4. Cook for another 20-40 minutes, only stirring every 5 minutes or so. This will allow your onions to caramelize slowly, making them sweet but not burnt. You can choose how dark you like them or how much patience & time you have. Add your minced garlic at the very end, along with your thyme. 


5. If you like a thicker soup, add 1 Tbsp of flour and stir together with the onions on low for a few minutes.


6. Warm up your stock and add to the onion mixture, stirring to combine. 


7. Simmer on medium low for 15 minutes. Taste for seasoning, if your stock isn’t salted you may want to add some here. You can also add some soy sauce or coconut aminos for added savory flavor.

8. Enjoy the soup as is, or top with garnishes.

Garnish
This soup can hold its own without any additional add-ons, but French onion soup really is a vessel for lots of crusty bread. You can top with toasted bread croutons that you cut into squares, or you can lay a whole slice of bread on top of your oven-safe bowl and broil for a few minutes. It makes your bread a combo of crispy and soft and it soaks up the onion broth perfectly. I also recommend adding shredded cheese, melting that on top of the bread too!


Simple Seasonal Bites

7/23/2016

 
This week I have created a few different sides that can be made using the same set of ingredients. Like last week, this is just a general guideline to help you navigate your CSA ingredients. All the ingredients can be adjusted to fit what is in season and in your pantry. Each of these tasty bites is composed of the EXACT same list of ingredients and presented in a different style:
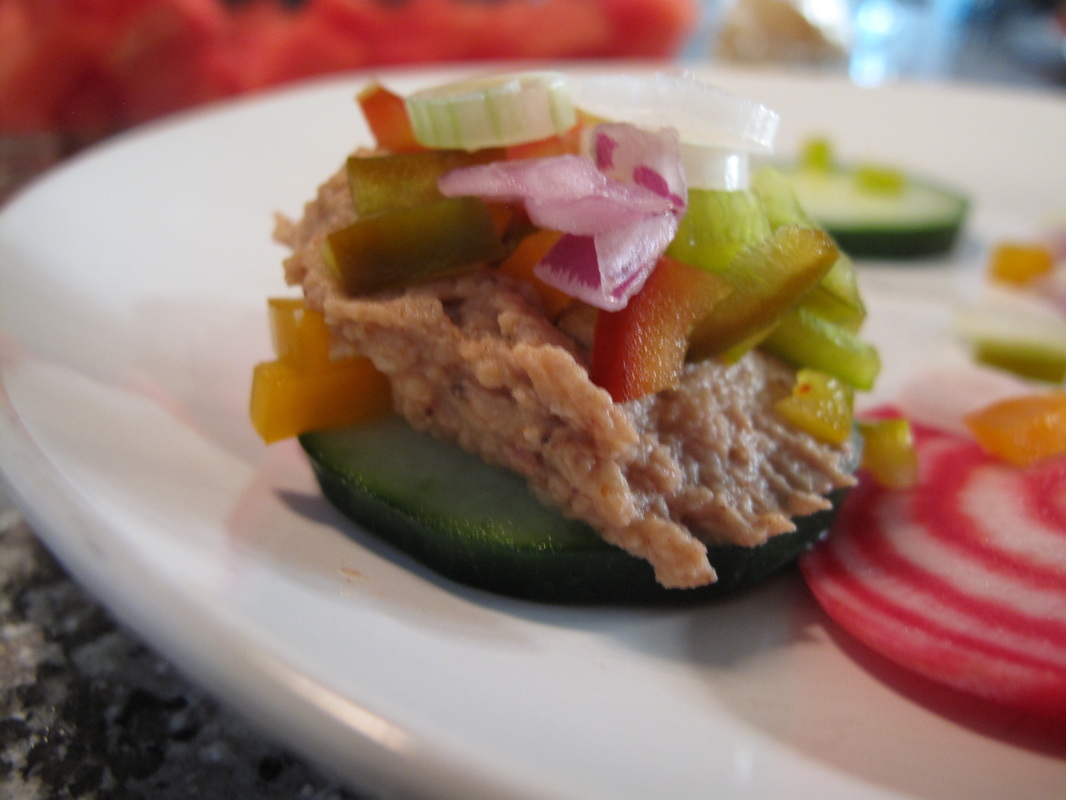
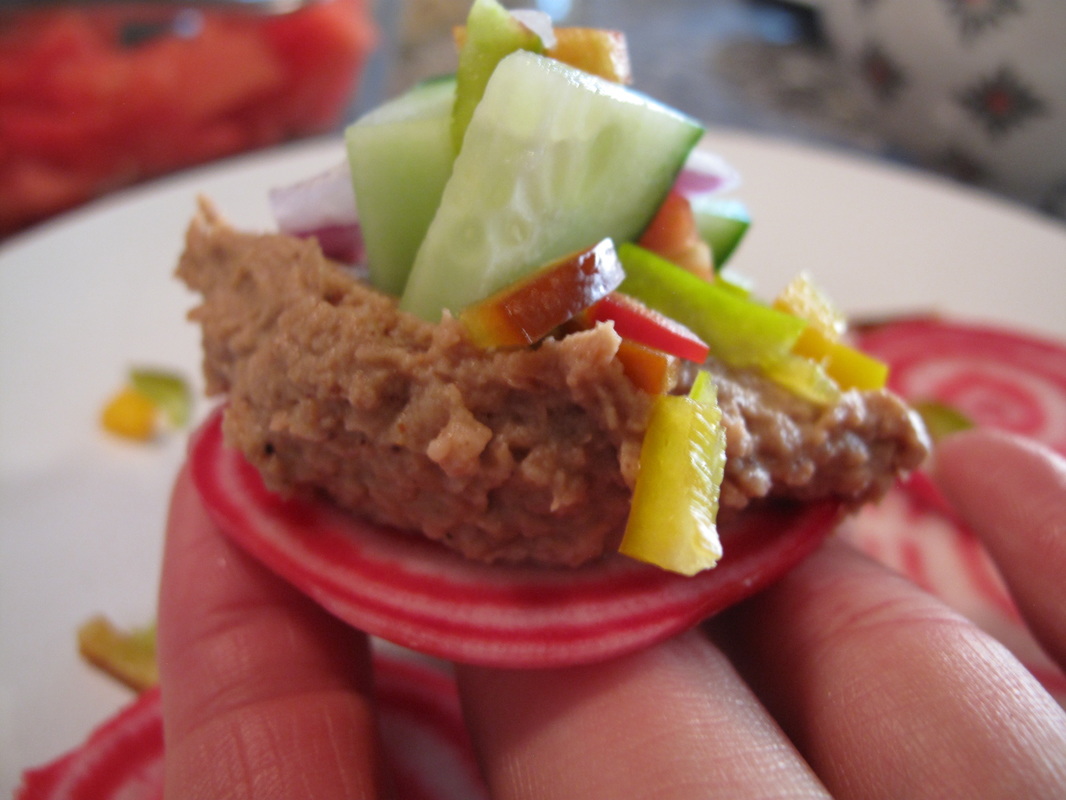
1. Beet & Cuke Rounds with Beans, Veggies and Cheese
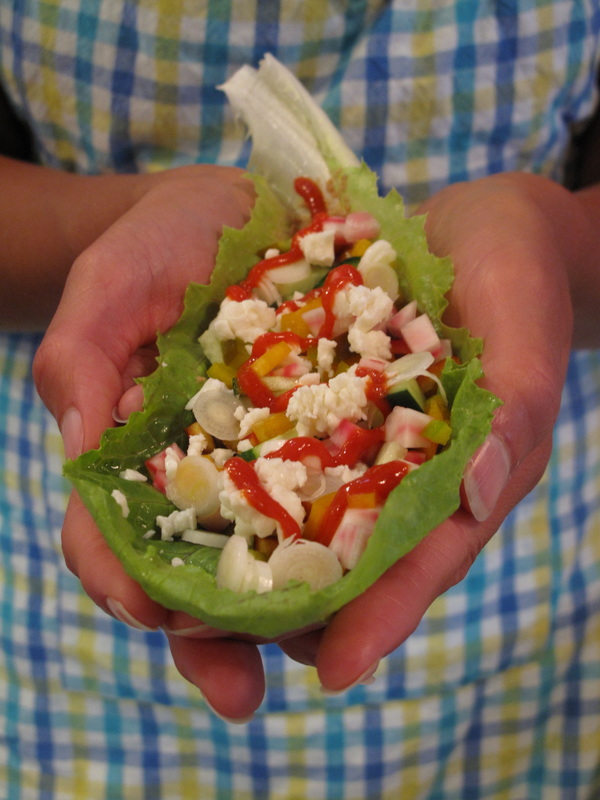
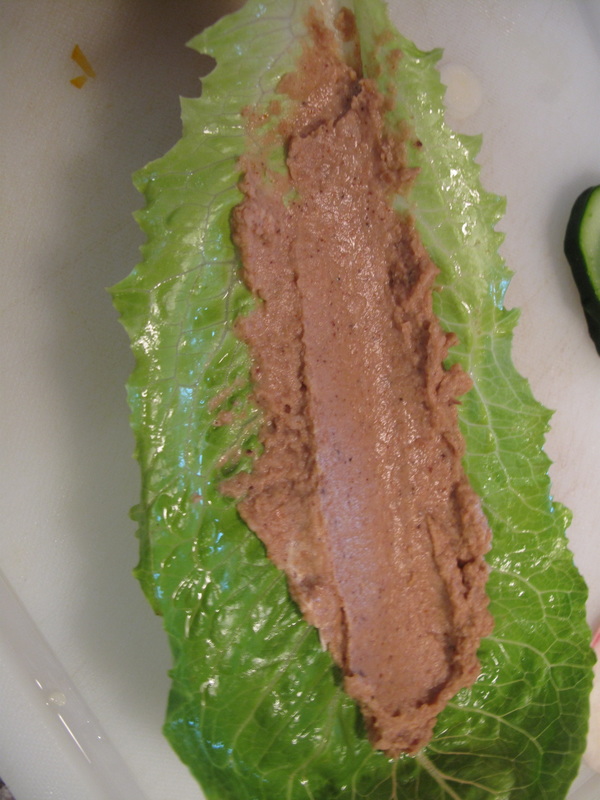
2. Lettuce Wrap with beets, beans and cukes
Picture
Picture
Picture
Ingredients:
4 large lettuce leaves washed
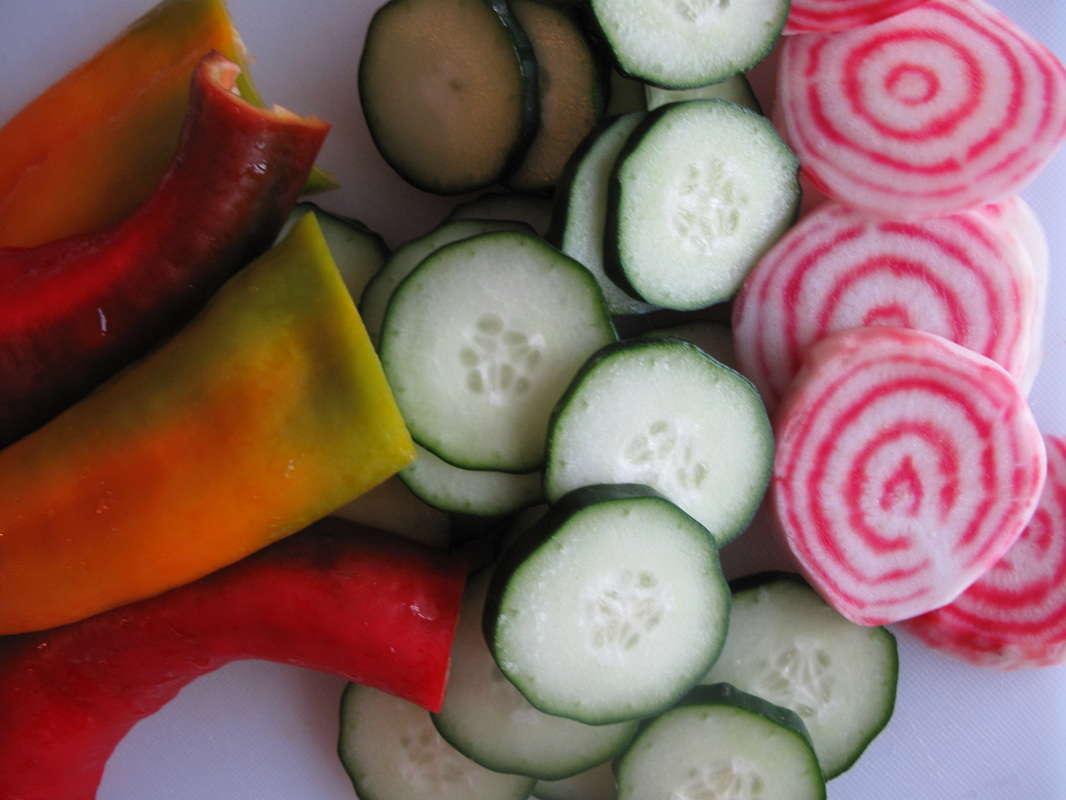
2 veggies of choice. I used cucumbers, beets, and pepper! You can use zucchini, squashes etc. Sliced into rounds or chopped.
2­-3 additional veggies for garnishing (Onion, cucumber, beets, peppers, herbs) Chopped to desired size.
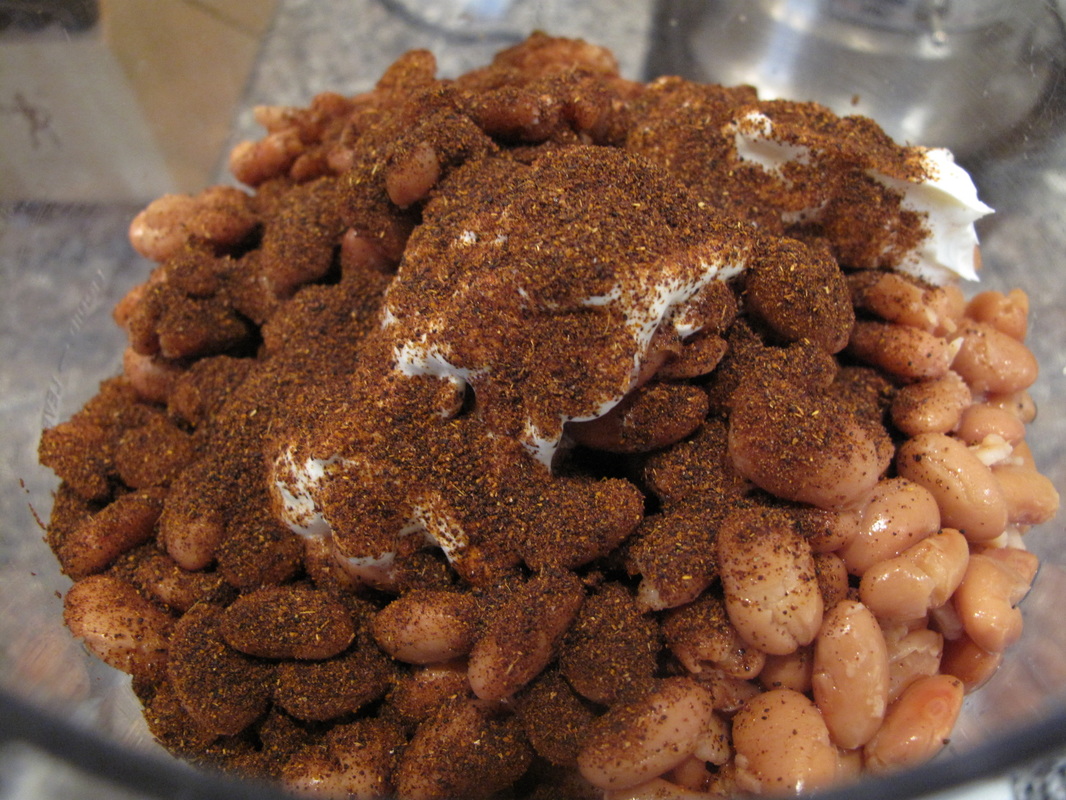
2 cups beans (I used pinto. You can use black, garbanzo, kidney, or any other!) Rinsed and drained.
1⁄4 cup sour cream (cream cheese or tahini­, if making a greek version)
2 Tbsp spice (I used chili powder)
1 Tsp salt
Juice of 1⁄2 lemon or lime
1⁄2 cup grated cheese to garnish
Picture
I like to think about a theme when I am creating little niblets like these. For example, the ones featured here use Mexican flavors, so I used pinto beans, chili powder, jalapeños and cilantro to garnish. If I were making a Greek version of this, I would use feta, basil and oregano, some tomatoes and garbanzo beans mixed with tahini. This recipe can guide and inspire you to try different versions of these appetizer bites, using the week’s goodies
Picture
Method:
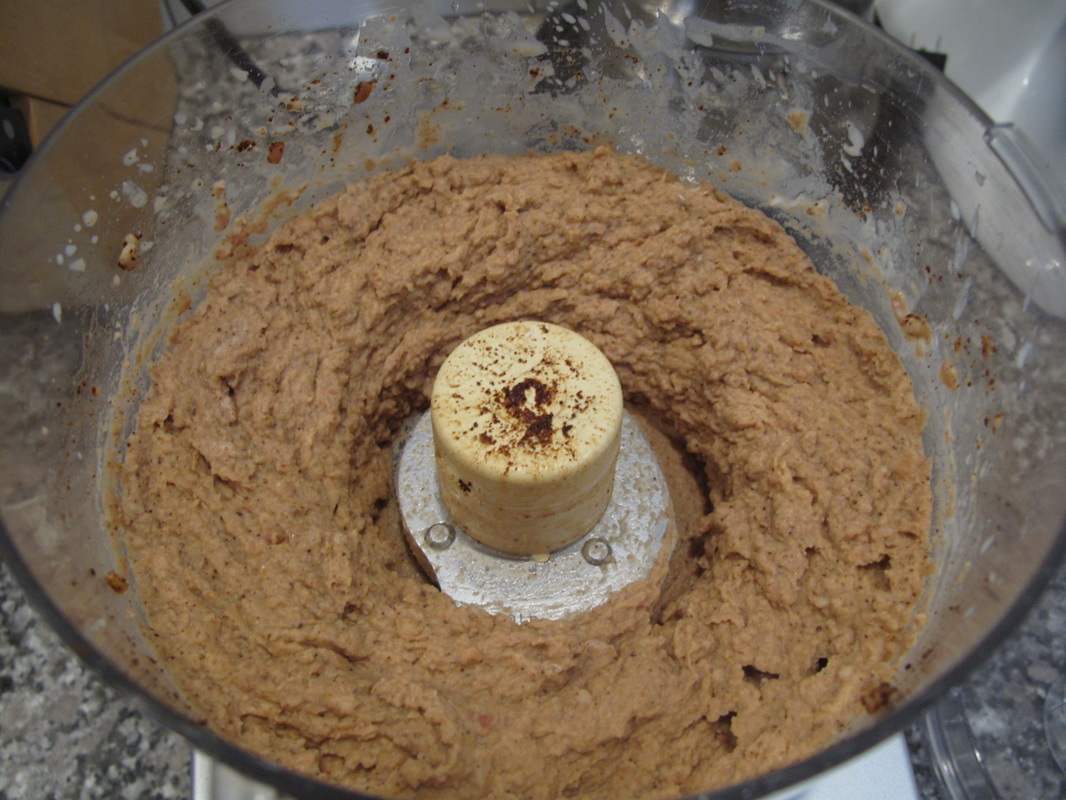
In a food processor, blend the beans, spice and sour cream (cream cheese or tahini) and citrus of choice. Once this has reached desired texture, set aside. Now layer a small spoonful of the beans into the lettuce or onto the veggie rounds. Next garnish with the veggies of choice, cheese and any sauces or herbs you like! Super simple, fun and refreshing! Try playing around with what's in your share and using what's in season to guide you. I used the peppers, beets, cukes, lettuce and green onions for the creations featured here.
Picture
Picture

    Search Recipes by Ingredient

    All
    Appetizers
    Arugula
    Asparagus
    Beans
    Beets
    Bok Choy
    Breakfast
    Broccoli
    Broccoli Rabe
    Brussels Sprouts
    Cabbage
    Carrots
    Casserole
    Collards
    Cucumbers
    Dessert
    Eggplant
    Frittata
    Garlic Scapes
    Greens
    Grilled Veggies
    Herbs
    Kale
    Kohlrabi
    Lettuce
    Melon
    Omlete
    Onions
    Pasta
    Peppers
    Pesto
    Pickles
    Pirogies
    Potatoes
    Potato Salad
    Quiche
    Radish
    Raw
    Salad
    Salad Dressing
    Salsa
    Sauerkraut
    Scallions
    Snacks
    Soup
    Spinach
    Spring
    Strawberries
    Sweet Potatoes
    Tacos
    Tomatillos
    Tomatoes
    Turnips
    Vegetarian
    Winter Squash
    Zucchini

    RSS Feed

    Authors

    Ali Price & Bella Black

Picture
Root 5 Farm 
Danielle Allen & Ben Dana
2340 US Route 5 North
Fairlee, Vermont 05045

(802) 923-6339
[email protected]
[email protected]
Picture
©Root 5 Farm LLC 2024 All Rights Reserved
Root 5 Farm grows certified organic vegetables and delivers throughout the Upper Valley May-December.
Picture
  • About Us
    • Our Farming Practices
    • Meet your Farmers
    • Employment Opportunities
    • Newsletters
  • CSA Membership
    • 2026 CSA Information
    • Pick Up Locations
    • Local Partners
    • Root 5 Farm Recipes
    • CSA Handbook
    • CSA Member Log-In
  • CSA Sign Up
  • Find our Products
    • Vegetable/ Recipe Search
    • Restaurants & Stores
    • Power Kraut
    • Fermentation Celebration!
  • Contact Us